Creality Pika scanner purchase and workflow
The scanner workflow prioritizes a usable shape, portable setup, top/bottom alignment, and practical shop conditions. Accuracy claims remain tied to the scanner, surface, lighting, and validation method actually used.
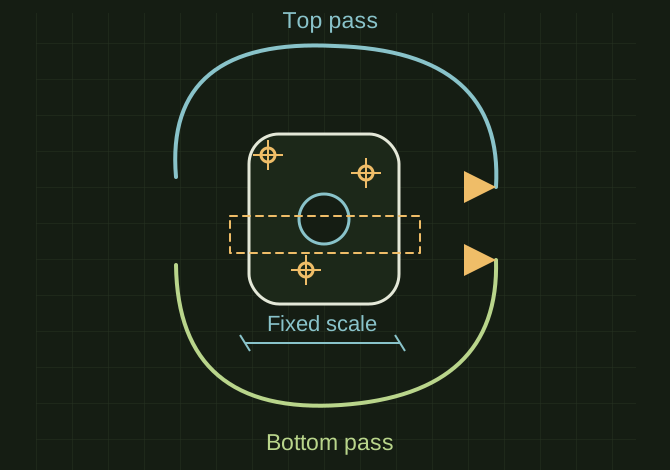
Carry the references around the part
 OPEN FULL SIZE ↗
- Capture
- Top and bottom with shared references
- Recover
- Scale
- Validation
- Hardware-specific checks remain open
TECHNICAL NOTES///
Creality Pika workflow notes, now connected to scan reconstruction examples and a scan-to-CAD reference case.
GOALCapture enough trustworthy geometry to support a remodel or inspection decision.
EQUIPMENT
- Scanner / mesh workflow
- Representative test model
- Measurement or inspection method
STEPS
- Plan overlap and reference markers.
- Control lighting and reflective surfaces.
- Capture top and bottom with shared references.
- Clean the mesh and recover scale.
- Compare the remodel against the scan.
TROUBLESHOOTING
- A visually correct model can still have bad units, references, or manufacturing intent.
- Keep source files and exported files distinct.
- When automation is involved, test a copy before changing a production directory.
RESULTThe archive now includes reconstruction examples and a scan-to-CAD case study. Calibration logs and a measured accuracy comparison are still missing; completed mesh repair is not a scanner accuracy test.
DEVELOPMENT HISTORY///
Imported as an independent manifest record; public copy keeps uncertainty visible.
Connected the newer project records: HOW-PIKA-001, MDL-ICE-SHOVEL-001, MDL-GNOME-001. Existing test limitations remain in place.
SPECIFICATION///
RELEASED MATERIAL///
The archive now includes reconstruction examples and a scan-to-CAD case study. Calibration logs and a measured accuracy comparison are still missing; completed mesh repair is not a scanner accuracy test.
The record keeps what is known at this revision. Unfinished tests stay unfinished here.