FlowPath lead-in troubleshooting
Inspect contour integrity and which side of the profile the lead occupies before adjusting its length.
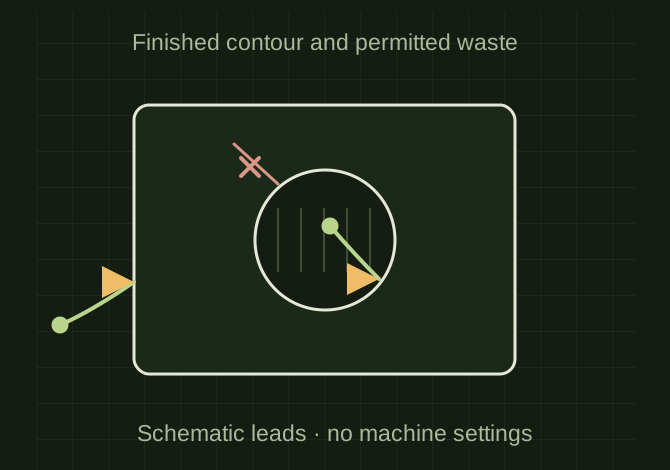
Start the cut in permitted waste
 OPEN FULL SIZE ↗
- Check
- Closed contours and inside/outside
- Place
- Start point and lead in permitted scrap
- Review
- Complete regenerated path
TECHNICAL NOTES///
Inspect contour integrity and which side of the profile the lead occupies before adjusting its length.
GOALRun the first test described in this guide and record the result for flowpath lead-in troubleshooting.
EQUIPMENT
- CAD / automation tool
- Representative test model
- Measurement or inspection method
STEPS
- Import the DXF with verified units and inspect for open ends, duplicate lines and tiny segments.
- Confirm closed contours and the intended inside/outside cut relationship.
- Review start point, lead direction and available scrap space; reposition the lead if it crosses finished geometry or a neighboring part.
- Regenerate and inspect the complete path, including internal-feature order and traverses, before transferring it through the shop’s normal review.
TROUBLESHOOTING
- A lead-in is not merely a cosmetic line. Piercing too near a finished edge or using the wrong contour direction can spoil the part. Do not guess a universal lead length for all thicknesses.
THINGS TO WATCH FOR
A lead-in is not merely a cosmetic line. Piercing too near a finished edge or using the wrong contour direction can spoil the part. Do not guess a universal lead length for all thicknesses.
RESULTThe preview pierces in permitted waste material and never crosses a protected finished contour.
DEVELOPMENT HISTORY///
Imported as an independent manifest record; public copy keeps uncertainty visible.
SPECIFICATION///
RELEASED MATERIAL///
The preview pierces in permitted waste material and never crosses a protected finished contour.
The record keeps what is known at this revision. Unfinished tests stay unfinished here.