Remote-holder project
Build around the actual remote and how it will be removed, not just its maximum width. A good holder provides finger access and avoids pressing buttons. Dimensions are to be measured; no original model or validated clearance was recovered.
Make room to remove the remote
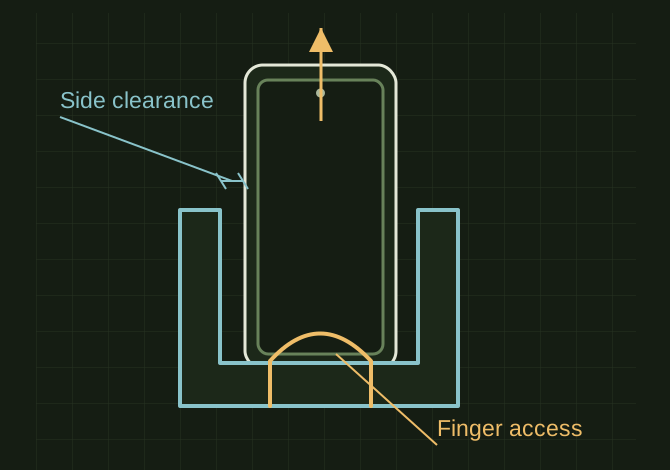 OPEN FULL SIZE ↗
- Measure
- Actual widest points
- Check
- Buttons, ports and removal
- Prototype
- Short fit ring first
TECHNICAL NOTES///
Build around the actual remote and how it will be removed, not just its maximum width. A good holder provides finger access and avoids pressing buttons.
GOALRun the first test described in this guide and record the result for remote-holder project.
PREPARATION / NOTES
Dimensions are to be measured; no original model or validated clearance was recovered.
EQUIPMENT
- FDM printer / slicer
- Slicer project
- Calipers or inspection method
MATERIALS
- Material requires confirmation
STEPS
- Measure width, depth and length at the widest points, then identify button and charging-port clearance.
- Model a short test ring with roughly 0.5–1 mm initial clearance per side; adjust to the real printer and desired looseness.
- Add finger access and a stable base or mounting interface. Start at 0.20 mm layers, 3 walls and 15–25% infill in PLA for a cool indoor location or a suitable tougher material.
- Print the full holder after the ring fits. For mounting, size the fastener or adhesive for the actual wall and expected pull direction.
TROUBLESHOOTING
- Cases and rubber grips increase friction. Tight cradles may hold down a button or make one-handed removal difficult. Thin adhesive contact patches can peel away under leverage.
THINGS TO WATCH FOR
Cases and rubber grips increase friction. Tight cradles may hold down a button or make one-handed removal difficult. Thin adhesive contact patches can peel away under leverage.
RESULTTest insertion, removal, button clearance and mounting with the actual remote.
DEVELOPMENT HISTORY///
Imported as an independent manifest record; public copy keeps uncertainty visible.
SPECIFICATION///
RELEASED MATERIAL///
Test insertion, removal, button clearance and mounting with the actual remote.
The record keeps what is known at this revision. Unfinished tests stay unfinished here.