Chip-clip project
A printed clip needs spring travel without forcing a thin layer seam to carry all the flexing. Treat fit, grip and fatigue as separate tests.
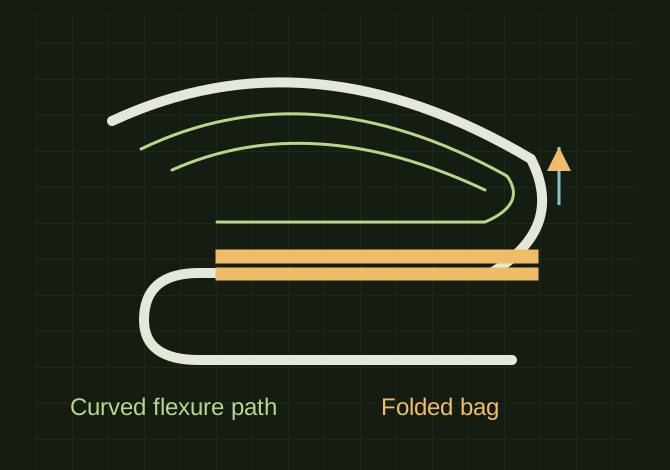
Flex the arms, protect the layer seams
 OPEN FULL SIZE ↗
- Tests
- Fit / grip / fatigue
- Observe
- Whitening, cracking, permanent opening
- Placement
- Outside food-contact area
TECHNICAL NOTES///
A printed clip needs spring travel without forcing a thin layer seam to carry all the flexing. Treat fit, grip and fatigue as separate tests.
GOALRun the first test described in this guide and record the result for chip-clip project.
EQUIPMENT
- FDM printer / slicer
- Slicer project
- Calipers or inspection method
MATERIALS
- Material requires confirmation
STEPS
- Measure the folded bag thickness and choose a spring clip or a rigid sliding closure.
- For a spring version, use generous bend radii and orient the curved arms so extrusion roads follow the flexing path where practical.
- Start a PETG prototype at 0.20 mm layers, 3–4 walls and 15–25% infill with the material profile in 3DP-027. Check that the flexure is actually represented in slicer preview.
- Test on an empty bag, cycle it repeatedly and inspect for whitening, cracking or permanent opening before normal use.
TROUBLESHOOTING
- Thin rigid PLA hinges often fail with repeated bending. Layered plastic is harder to sanitize than a smooth commercial clip; keep it outside the food-contact area.
THINGS TO WATCH FOR
Thin rigid PLA hinges often fail with repeated bending. Layered plastic is harder to sanitize than a smooth commercial clip; keep it outside the food-contact area.
RESULTThe clip should close the intended bag without puncturing it and still recover after repeated opening.
DEVELOPMENT HISTORY///
Imported as an independent manifest record; public copy keeps uncertainty visible.
SPECIFICATION///
RELEASED MATERIAL///
The clip should close the intended bag without puncturing it and still recover after repeated opening.
The record keeps what is known at this revision. Unfinished tests stay unfinished here.