Efficient 3D Printing Setup
A conversation-specific public summary of efficient 3d printing setup, distilled from the supplied export. The detailed excerpts remain available in the released note file.
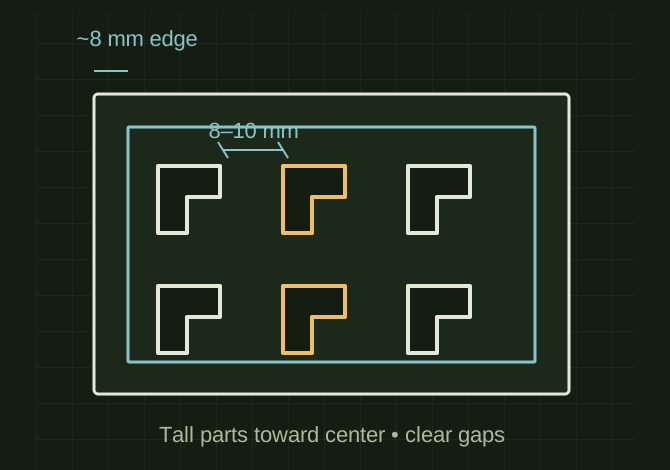
Space between parts on a crowded plate
 OPEN FULL SIZE ↗
- Between parts
- 8–10 mm
- Usable-edge clearance
- About 8 mm
- Layer height mentioned
- 0.28 mm
TECHNICAL NOTES///
Conversation-specific knowledge extracted from the efficient 3d printing setup discussion.
QUESTION / CONTEXTi printing these parts again....i want to try printing them on my new creator 5 pro. they are proto types for fit up so i need them strong enough t ohold up to being handled and checked for fit up but thats all. I will be using a .4 nozzle and matte pla. I will need supports i know that walk me through getting the most efficient print out of this please
IMPORTANT GUIDANCE
- Leave at least 8–10 mm between parts.
- Keep parts about 8 mm from the usable edge of the plate.
- Do not use sequential “by object” printing with this crowded layout.
- Consider dividing this into two plates. One failed support or lifted corner could ruin the entire full-bed batch.
- Put the tallest bracket-like parts closer to the center of the bed.
- Rotate parts so the raised brackets do not point toward neighboring parts.
- --
- Layer height: `0.28 mm`
Extracted from the conversation’s assistant responses and edited for public clarity. See the released note for additional redacted excerpts.
DEVELOPMENT HISTORY///
Matched to the supplied export; key guidance is surfaced separately and the raw transcript remains unpublished.
SPECIFICATION///
RELEASED MATERIAL///
RECOVERED / SPECIFIC NOTE
The record keeps what is known at this revision. Unfinished tests stay unfinished here.